Quick Start Guide
Set Up
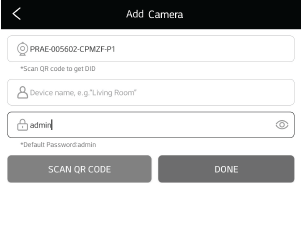
1. Add Camera on the App.
Click the “+” button on the top right to add camera. Device name is optional.
Default Password: admin

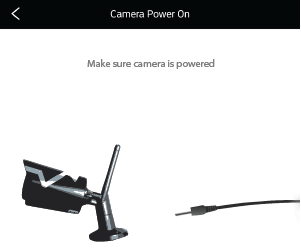
2. Power On Camera.
Click “Powered on, Next” after camera powers on.

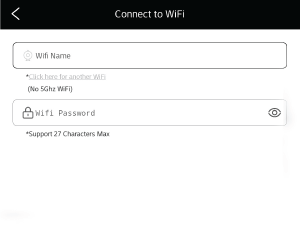
3. Choose a WiFi Network.
Input the password. Then Click “Next”.

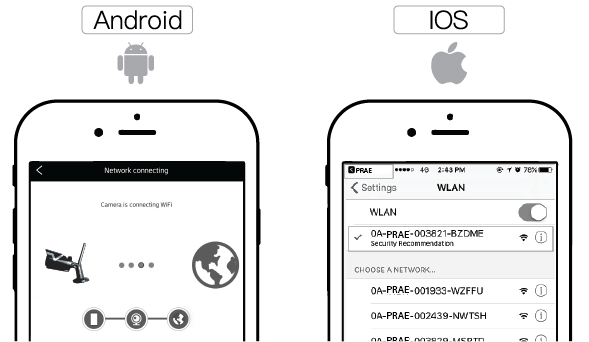
4. Connect to WiFi Network.
Wait for the camera to connect to the WiFi.

Main Icons

Camera settings

Click to playback local video

Motion detection on / off

Local screenshot, which can be viewed in “Photos”

Record, find video(s) in “Photos”

Mute and unmute live stream

Screen vertical / horizontal switch

Camera settings

Motion detection on / off

Click to playback local video

Local screenshot, which can be viewed in “Photos”

Record, find video(s) in “Photos”

Mute and unmute live stream

Screen vertical / horizontal switch

Camera settings

Motion detection on / off

Click to playback local video

Local screenshot, which can be viewed in “Photos”

Record, find video(s) in “Photos”

Mute and unmute live stream

Screen vertical / horizontal switch
FAQs
What if I forget the device password?
- Reset the camera by finding the reset button, under the cap, on the third cord attached to the camera.
- Follow the diagram below.
- Password will reset to “admin”. Click “Setting” icon to re-configure the WIFI setting.

How can I change the camera’s WiFi network?
- Click “Setting” icon to re-configure the WIFI setting.
- Choose a Network from the list and input the right password.
How can I mount the camera?
- Use mounting template to mark drill holes and drill the holes.
- Screw in the bracket.
- Attached camera to bracket and adjust the angle.
What to do when your router or WiFi password is changed?
- Restart the camera by powering off and then powering on.
- Click “Setting” on the App, then configure the new WiFi network.
Note: Grab a cup of coffee… reconfiguration can take several minutes.
What to do if the camera is off line?
- Click “Setting” and check your WIFI status.
- Restart the camera by unplugging the power cable.
